How to Pour Concrete Footings For A Retaining Wall?
Important Point
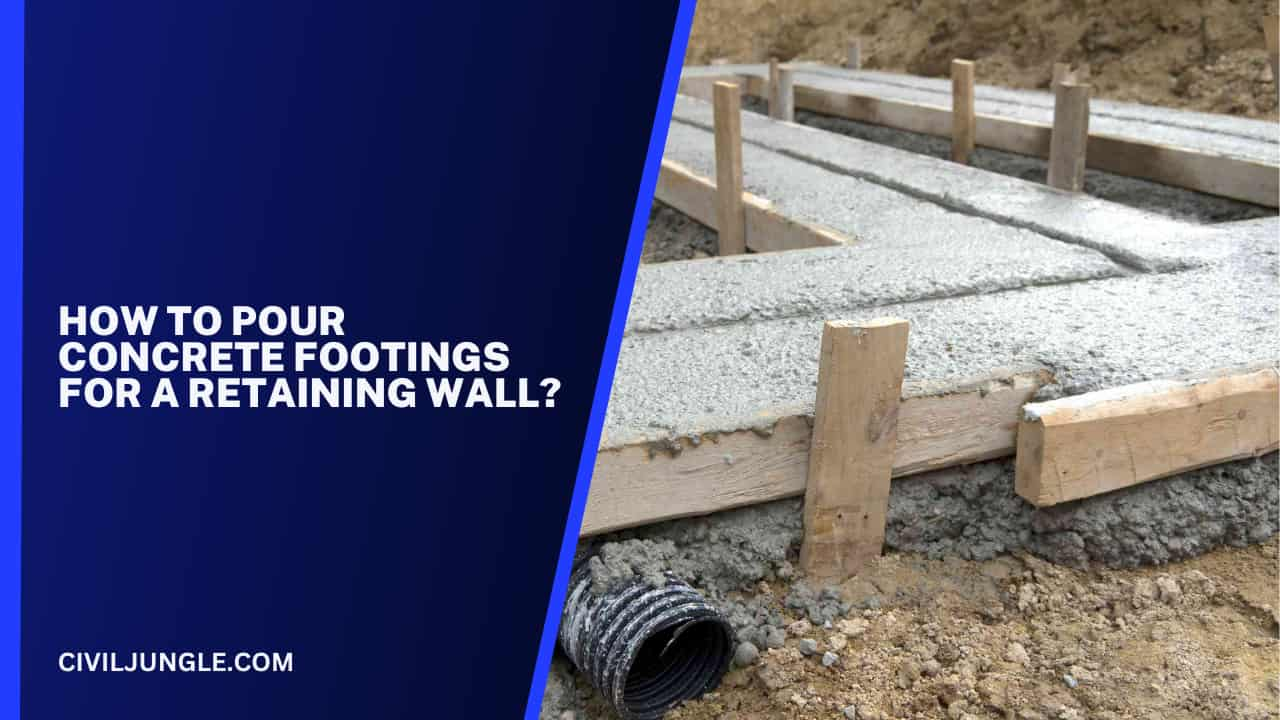
A retaining wall is a structure designed to hold back soil and prevent erosion. When building a retaining wall, one of the most important steps is pouring the concrete footings.
Concrete footings provide a stable and level base for the wall to be built on, ensuring that it will be strong and long-lasting. In this article, we will go over the steps involved in pouring concrete footings for a retaining wall.
1. Determine the Size of the Footings
The first step in pouring concrete footings for a retaining wall is to determine the size of the footings that will be needed. This will depend on the size and weight of the wall that will be built. In general, the footings should be at least twice as wide as the wall itself and should extend below the frost line to prevent the ground from freezing and heaving.
To determine the size of the footings, you will need to consult the building codes and regulations in your area. In some cases, you may need to have an engineer or architect design the footings for you.
2. Excavate the Footing Area
Once you have determined the size of the footings, the next step is to excavate the area where the footings will be poured. Use a shovel or a backhoe to remove the soil down to the required depth. It is important to ensure that the bottom of the excavation is level and compacted to provide a solid base for the concrete.
3. Install Rebar
Before pouring the concrete, you will need to install rebar to reinforce the footings. Rebar is a type of steel bar that is used to provide additional strength and support to the concrete. The rebar should be placed in a grid pattern, with the bars spaced apart at equal intervals.
To install the rebar, use wire ties to hold the bars in place, and ensure that they are positioned at the required depth. The top of the rebar should be at least 2 inches below the top of the concrete footing.
4. Build Forms
Once the rebar is in place, you will need to build forms to contain the concrete. Forms are typically made from wood, metal, or plastic and are used to create the shape and size of the concrete footing. The forms should be sturdy and level to ensure that the concrete will be poured evenly.
To build the forms, cut the boards to the required length and nail them together at the corners. Use stakes or bracing to hold the forms in place and ensure they are level and plumb.
5. Pour the Concrete
With the forms in place, you are ready to pour the concrete. It is important to use a high-quality concrete mix and to follow the manufacturer’s instructions carefully. The concrete should be poured in layers, with each layer being compacted and smoothed before the next layer is added.
As you pour the concrete, use a level to ensure that it is even and that the forms are still level. The top of the concrete should be level with the top of the forms.
6. Finish the Surface
Once the concrete has been poured, use a trowel to smooth the surface and ensure it is level. You can also add a broom finish or other decorative finish to the surface if desired.
It is important to allow the concrete to cure for at least 24 hours before removing the forms. This will give the concrete time to harden and set, ensuring that it will be strong and durable.
7. Maintain the Footings
After the concrete has cured, it is important to maintain footings to ensure that they remain strong and stable. Keep the area around the footings free from debris and vegetation, and make sure that any drainage systems are functioning properly.
How Do You Measure a Footing for a Retaining Wall?
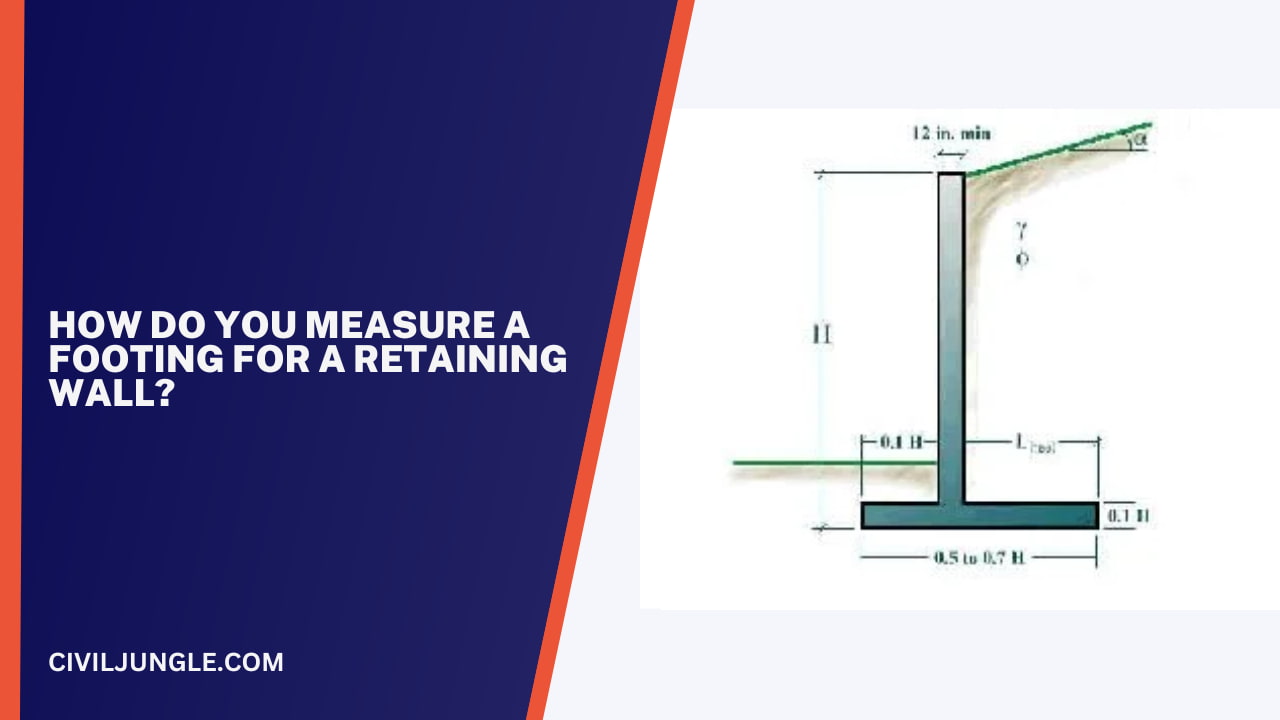
Measuring a footing for a retaining wall is an important step in the construction process. The footing provides a stable base for the wall, which is essential to prevent shifting, tilting, or collapse. Here are some steps to help you measure a footing for a retaining wall.
Determine the Size and Weight of the Wall
The size and weight of the retaining wall will determine the size of the footing needed. A larger, heavier wall will require a larger footing to provide a stable base. Be sure to take into account any additional weight that may be added to the wall, such as soil, plants, or decorative features.
Check Local Building Codes and Regulations
Before beginning construction, it is important to check the local building codes and regulations for your area. These regulations will dictate the minimum size and depth of the footing, as well as any other requirements for construction.
Calculate the Size of the Footing
The size of footing should be at least twice the width of the wall. For example, if the wall is 6 feet wide, the footing should be at least 12 feet wide. In addition to the width, the depth of the footing is also important.
The footing should extend below the frost line to prevent shifting and tilting due to ground movement. The depth of the frost line will vary depending on your location, so be sure to check local regulations to determine the appropriate depth for your area.
Determine the Type of Soil
The type of soil will also play a role in determining the size of the footing. Soils with high clay content will require a larger footing to provide stability. In addition, soils with high water content may require drainage systems to prevent water from building up and causing erosion.
Prepare the Site
Before pouring the footing, it is important to prepare the site. The area should be leveled and cleared of any debris or vegetation. It may be necessary to excavate the site to reach the appropriate depth for the footing.
Install Reinforcing Steel
Reinforcing steel, or rebar, should be installed in the footing to provide additional strength and stability. The rebar should be placed in a grid pattern within the footing to distribute the weight of the wall evenly.
Pour the Concrete
Once the site is prepared and the reinforcing steel is in place, the concrete can be poured. The concrete should be poured in one continuous pour to ensure a solid footing. Be sure to work quickly, as the concrete can begin to set within 30 minutes.
Level and Smooth the Surface
After pouring the concrete, the surface should be leveled and smoothed to ensure a solid base for the retaining wall. A trowel or float can be used to smooth the surface of the concrete.
Allow the Concrete to Cure
The concrete should be allowed to cure for at least 24-48 hours before beginning construction on the retaining wall. This will allow the concrete to harden and provide a stable base for the wall.
Measuring a footing for a retaining wall is an important step in the construction process. By taking into account the size and weight of the wall, local building codes and regulations, the type of soil, and the appropriate depth and width of the footing, you can ensure a stable base for the retaining wall.
Proper preparation and installation of the reinforcing steel and concrete will provide added strength and stability to the footing. Be sure to allow adequate time for the concrete to cure before beginning construction on the retaining wall.
Also Read: All About Concrete Bond | Will Concrete Bond to Concrete | How Concrete Adhesion Works
How Deep Do Footings Need To Be for a Retaining Wall?
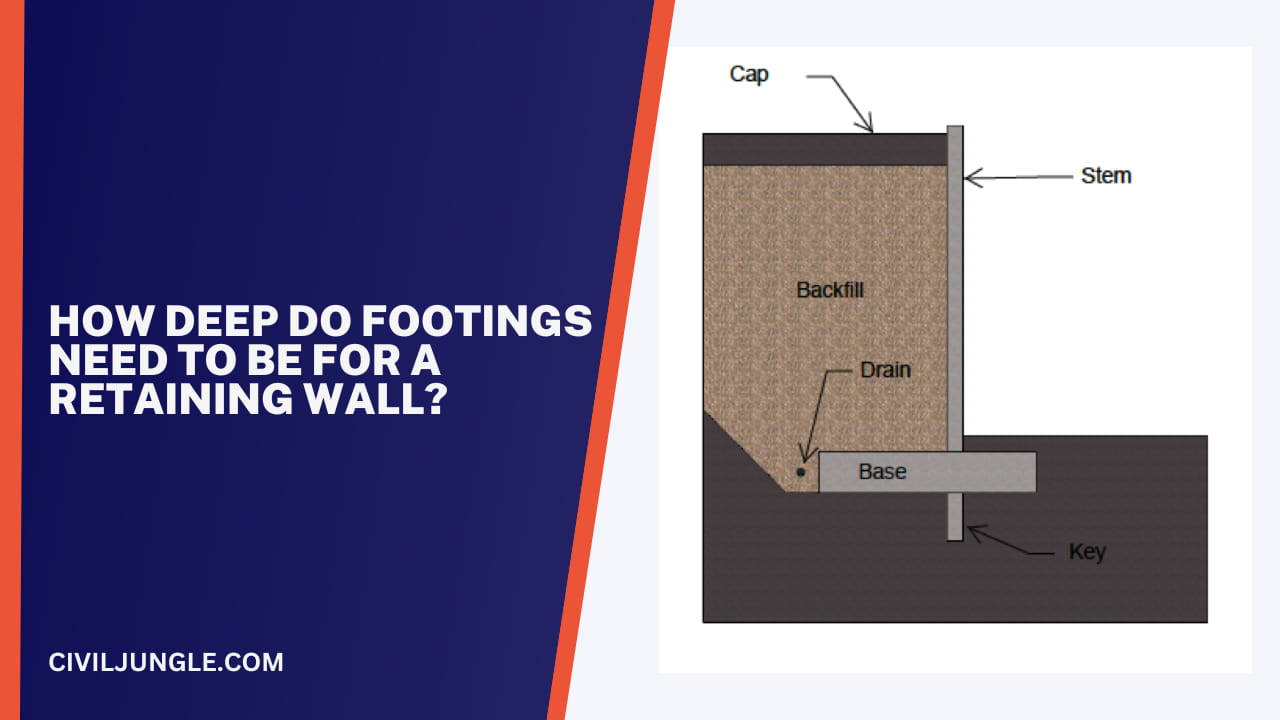
Footings are an essential part of construction of a retaining wall. They provide a stable base for the wall, which is necessary to prevent tilting, shifting, or collapse.
The depth of the footings will depend on several factors, including the size and weight of the wall, the type of soil, and local building codes and regulations.
The first consideration when determining the depth of the footings is the size and weight of the retaining wall. A larger and heavier wall will require a deeper footing to provide stability.
The depth of the footing should be at least 1/3 to 1/2 the height of the wall, but this can vary depending on the specific conditions of the site. For example, if the wall is 6 feet tall, the footing should be at least 2-3 feet deep.
The next consideration is the type of soil in which the footing will be installed. Soils with high clay content or high water content will require a deeper footing to provide stability. In addition, the depth of the frost line must be considered.
The frost line is the depth at which the ground freezes in the winter. If the footing is not installed below the frost line, it can be subject to heaving and shifting due to the expansion of frozen ground.
The depth of the frost line will vary depending on the location, so it is important to consult local building codes and regulations to determine the appropriate depth for the footing.
In addition to the depth of the footing, the width of the footing is also important. The width of the footing should be at least twice the width of the wall.
This provides a stable base for the retaining wall and distributes the weight of the wall evenly across the footing. The depth and width of the footing work together to provide stability and prevent tilting, shifting, or collapse of the wall.
Proper installation of the footing is also essential to ensure stability. The site should be prepared by clearing away any vegetation or debris and ensuring the surface is level.
Excavation may be required to reach the appropriate depth for the footing. Reinforcing steel, or rebar, should be installed in a grid pattern within the footing to provide additional strength and stability.
The concrete should be poured in one continuous pour to ensure a solid footing. The surface should be smoothed and leveled to provide a stable base for the retaining wall. The concrete should be allowed to cure for at least 24-48 hours before beginning construction on the retaining wall.
In addition to the depth and width of the footing, there are other considerations to ensure the stability of the retaining wall. Proper drainage is essential to prevent water from building up behind the wall and causing erosion. This can be accomplished by installing drainage pipes or gravel behind the wall.
The type of soil and vegetation around the wall should also be considered. Soils with high water content or unstable slopes may require additional measures, such as terracing or retaining walls on the uphill side of the wall. Proper maintenance of the wall, such as monitoring for signs of tilting or shifting and addressing any issues promptly, is also important to ensure long-term stability.
In summary, the depth of the footings for a retaining wall will depend on several factors, including the size and weight of the wall, the type of soil, and local building codes and regulations.
The depth of the footing should be at least 1/3 to 1/2 the height of the wall and extend below the frost line to prevent shifting and tilting. The width of the footing should be at least twice the width of the wall to provide a stable base and distribute the weight of the wall evenly.
Proper installation of the footing, including the use of reinforcing steel and one continuous pour of concrete, is essential to ensure stability. Proper drainage, consideration of the soil and vegetation.
List of Tools Required for Poring Concrete for Retaining Walls.
Pouring concrete footings for retaining walls requires several tools, each with a specific use. Here are some of the essential tools required for the task and their purposes:
- Measuring Tape: This is used to measure the length, width, and depth of the trench or footing to ensure the dimensions are accurate.
- Level: A level is used to ensure that the footing is even and flat. This is important to ensure that the wall is straight and stable.
- Shovel: A shovel is required to excavate the trench or footing. It can also be used to mix the concrete if a mixer is not available.
- Wheelbarrow: This is used to transport the concrete mix from the mixer to the footing.
- Concrete Mixer: A concrete mixer is used to mix the concrete. This can be either a portable mixer or a mixer attached to a truck.
- Reinforcing Steel: This is used to reinforce the concrete and prevent cracking. It is placed in the footing and held in place using wire ties.
- Concrete Finishing Tools: These tools are used to smooth the surface of the concrete and ensure that it is even. Examples of finishing tools include a trowel, float, and edger.
- Vibrating Plate: A vibrating plate is used to compact the concrete and ensure that it is evenly distributed in the footing.
- Concrete Forms: These are used to create a mold for the footing. The forms can be made from wood, plastic, or metal.
- Safety Gear: Safety gear, including gloves, safety glasses, and a hard hat, should be worn to protect against injury.
In conclusion, pouring concrete footings for retaining walls requires specific tools that are necessary for the job. Having the right tools will make the process easier, faster, and more efficient.
When using these tools, it is important to ensure safety measures are followed to prevent accidents and injuries. With the proper tools and safety precautions, pouring concrete footings for retaining walls can be completed effectively and efficiently.
Are Concrete Footings Necessary for Small Retaining Walls?
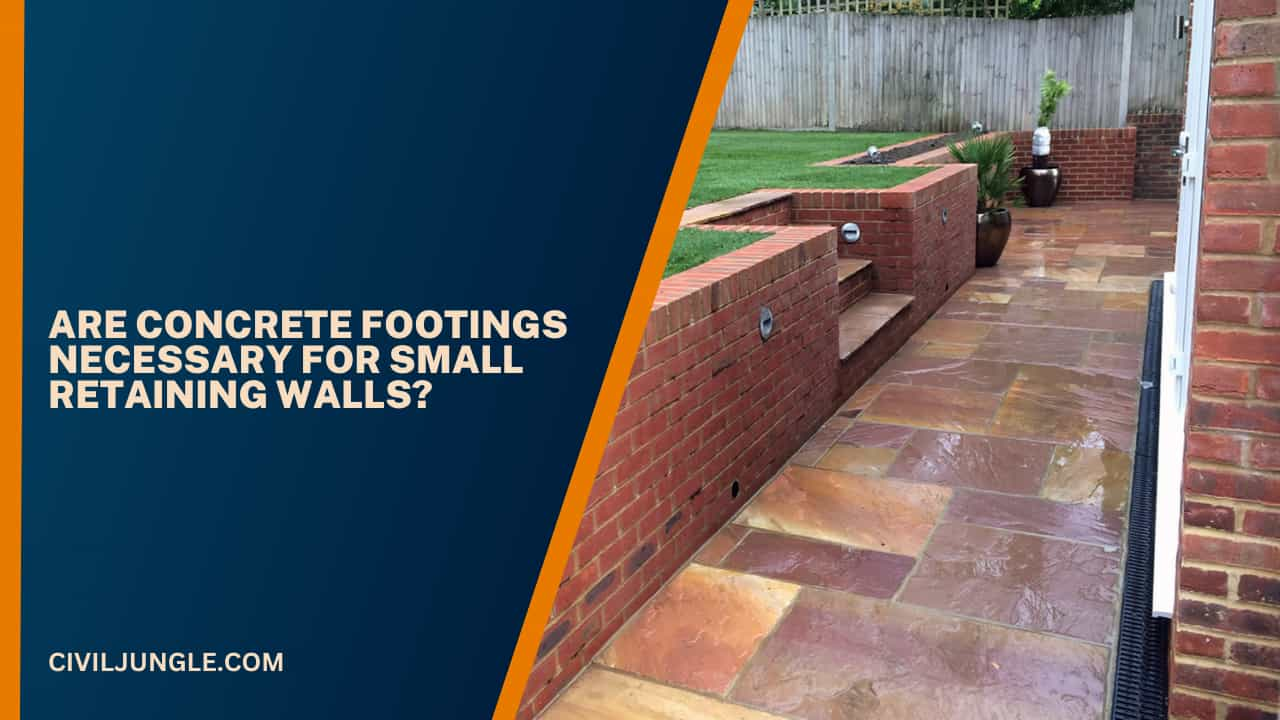
While concrete footings are not always necessary for small retaining walls, they can provide added stability and durability to the wall.
The decision to use a footing will depend on the specific circumstances of the project, including the size and weight of the wall, the type of soil, and the local building codes and regulations.
Small retaining walls that are less than three feet in height may not require a concrete footing, particularly if they are built on well-drained soil and will not be supporting heavy loads. In some cases, a simple trench can be excavated to provide a stable base for the wall.
The width and depth of the trench will depend on the specific conditions of the site, including the type of soil and the size and weight of the wall.
However, even for small retaining walls, the use of a concrete footing can provide added stability and durability. Footings can distribute the weight of the wall evenly and prevent tilting or shifting due to soil erosion or other factors. In addition, footings can provide a more stable base for the wall, particularly in soils that are prone to shifting or are not well-drained.
If the retaining wall will be located in an area with high water content or unstable soil, it may be necessary to use a concrete footing to provide stability. In addition, local building codes and regulations may require the use of a footing, even for small retaining walls.
When installing a concrete footing for a small retaining wall, the same principles as for larger walls apply. The footing should be at least 1/3 to 1/2 the height of the wall and extend below the frost line to prevent shifting and tilting.
The width of the footing should be at least twice the width of the wall to provide a stable base and distribute the weight of the wall evenly. Proper installation of the footing, including the use of reinforcing steel and one continuous pour of concrete, is essential to ensure stability.
In summary, while concrete footings may not always be necessary for small retaining walls, they can provide added stability and durability to the wall. The decision to use a footing will depend on the specific circumstances of the project, including the size and weight of the wall, the type of soil, and local building codes and regulations.
If the retaining wall will be located in an area with high water content or unstable soil, it may be necessary to use a concrete footing to provide stability. Proper installation of the footing is essential to ensure stability, regardless of the size of the retaining wall.
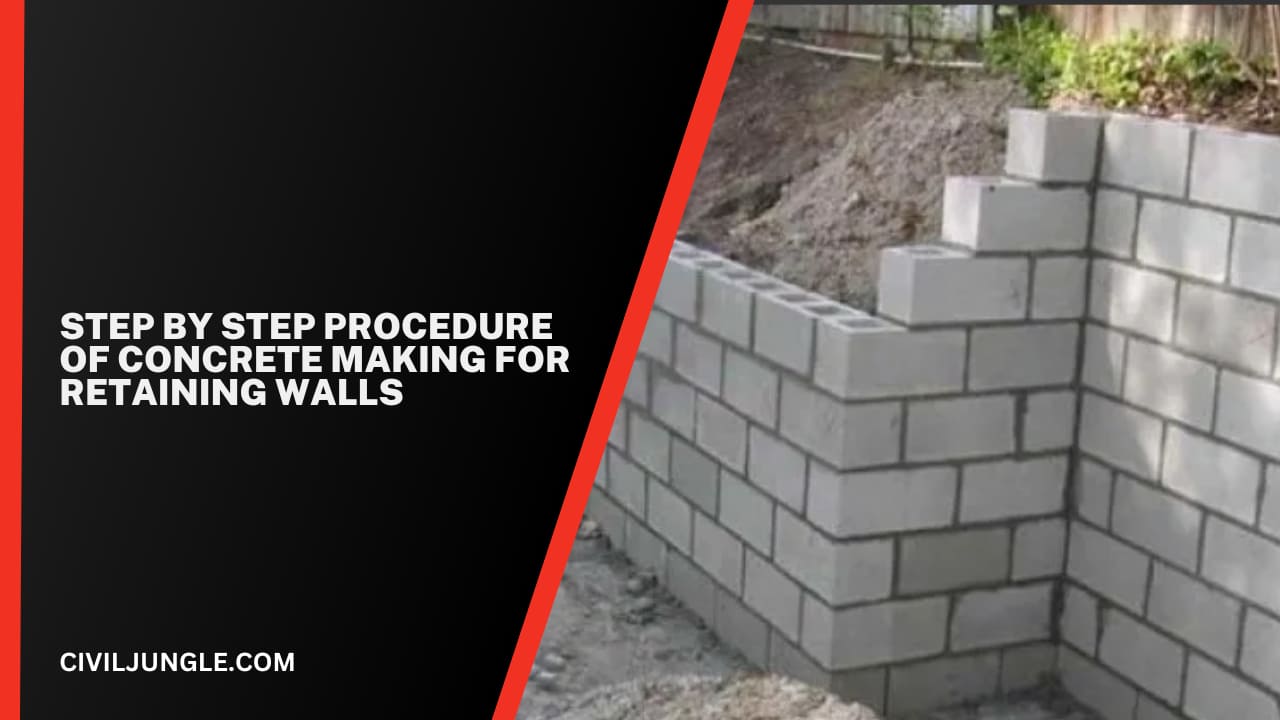
Step by Step Procedure of Concrete Making for Retaining Walls
Here is a step-by-step guide to making concrete for retaining walls:
Step 1: Excavate the Trench or Footing
The first step is to excavate the trench or footing to the required depth and width. The trench should be at least 1/3 to 1/2 the height of the wall and extend below the frost line to prevent shifting and tilting. The width of the trench should be at least twice the width of the wall to provide a stable base.
Step 2: Place the Reinforcing Steel
Next, place the reinforcing steel in the trench or footing. The steel should be placed in a grid pattern and held in place using wire ties. The steel helps to reinforce the concrete and prevent cracking.
Step 3: Mix the Concrete
Mix the concrete in a mixer or by hand in a wheelbarrow. The mix should be made using the appropriate ratio of cement, sand, and aggregate, as specified by the manufacturer. The mix should be thick enough to hold its shape, but not too dry or too wet.
Step 4: Pour the Concrete
Pour the concrete into the trench or footing. The concrete should be poured in one continuous pour to ensure the footing is even and stable. Use a shovel or rake to spread the concrete evenly throughout the trench or footing.
Step 5: Compact the Concrete
After pouring the concrete, use a vibrating plate to compact the concrete and ensure that it is evenly distributed in the footing. This helps to eliminate any air pockets and ensures that the concrete is properly consolidated.
Step 6: Smooth and Finish the Surface
Smooth and finish the surface of the concrete using concrete finishing tools, such as a trowel, float, and edger. This will ensure that the surface is even and free of any rough spots.
Step 7: Allow the Concrete to Cure
Allow the concrete to cure for the recommended amount of time, as specified by the manufacturer. This usually takes several days, depending on the temperature and humidity levels.
In summary, the process of making concrete for retaining walls involves excavating the trench or footing, placing the reinforcing steel, mixing the concrete, pouring the concrete, compacting the concrete, smoothing and finishing the surface, and allowing the concrete to cure. With the right tools and techniques, the concrete footing will be strong and durable, providing a solid foundation for the retaining wall.
How to Pour Concrete Footings for a Retaining Wall?
- Layout where the footing will go.
- Excavate the trench where your footing will be poured.
- Pour and compact some gravel at the base of your footing. I generally use about an inch.
- Install steel rebar.
- Pour the concrete.
Do I Need a Concrete Footing for a Retaining Wall?
The key to building a strong and durable retaining wall is a stable footing and proper drainage. A retaining wall needs a footing because if the ground below it shifts, the wall will shirt too and possibly collapse.
How Deep Should a Concrete Footing Be for a Retaining Wall?
The general rule of thumb is to bury about one-eighth of the height of the wall. For example, if your wall will be three feet (36 inches) tall, the first course of blocks should start five inches below soil level. The gravel base should start three inches below this.
How Deep Do Concrete Footings Need to Be?
Footings should extend to a minimum depth of 12 inches below previously undisturbed soil. Footings also must extend at least 12 inches below the frost line (the depth to which the ground freezes in winter) or must be frost-protected.
Do Footings Need Rebar?
Plain concrete deck foundations without rebar are acceptable under the minimum standards of construction established in the International Residential Code. However, placing reinforcing steel within footings is a relatively easy and inexpensive practice that can provide increased performance.
Does a 2 Foot Retaining Wall Need Drainage?
All retaining walls require adequate drainage systems to make them safe and sturdy.
What Is the Best Mix for Concrete Blocks?
A good mixture is 1 part lime or cement, 3 parts clay, 6 parts sand, 0.2 part bitumen and water.
How Deep Should a Concrete Retaining Wall Be?
The trench should be deep enough to bury at least half the height of your first course of blocks as they sit on a 2- to 3-inch base of gravel. Depending on the size of your blocks, this depth will be about 4 to 6 inches.
Like this post? Share it with your friends!
Suggested Read –
- Smooth Wheel Roller
- Monolithic Footing
- Plaster Wall Finish
- Concrete Surface Finishes
- Concrete Mixing Formulas
- What Is a Fence Post Anchor | Do Fence Post Anchors Work | How to Install a Fence Post Anchor Spike
- What Is Pier Foundation | Types of Drilled Piers | Advantages and Disadvantages of Drilled Pier Foundations
- What Is Bond Breaker | Purpose of Providing Bond Breaker | What Is Concrete Bond Breaker | What is Bond Breaker Tape
- What Is Grade Beam | What Is Grade Beam Foundation | Grade Beam Construction Process |Advantages & Disadvantage of Grade Beam
- What Is Pier and Beam Foundation | Advantages & Disadvantage of Pier and Beam Foundations | Pier and Beam Foundation Design | How to Build a Post and Pier Foundation
Originally posted 2023-06-21 20:13:49.

Leave a Reply